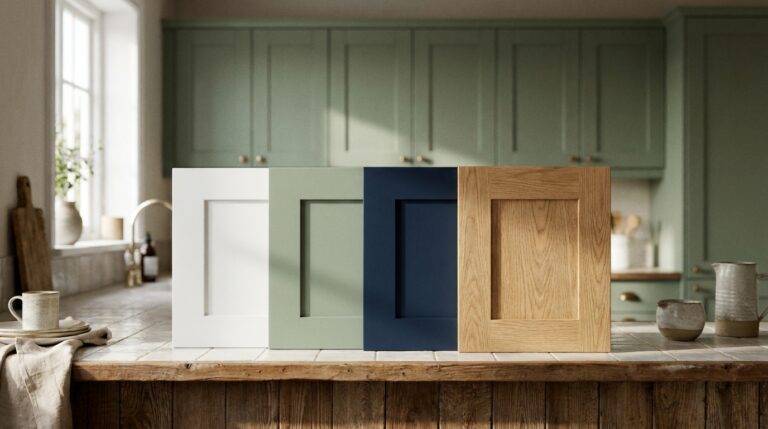
A small kitchen rarely fails because it is small. It fails because too many things compete for the same few feet of counter and cabinet space. If you want to know how to organize a small kitchen so it stays that way, the answer is a sequence: cut what you own, decide where each task happens, use the height of the room, then protect the result with a few habits.
This guide walks through those steps in order. Skip ahead if you like, but the order matters. Buying bins before you declutter just gives clutter a nicer home.
Step 1: Declutter before you organize
Empty one zone at a time, not the whole kitchen at once. Start with the cabinet or drawer that annoys you most, take everything out, and wipe it down. Then sort each item into one of four piles: keep here, keep elsewhere, donate, toss.
A few questions make the sorting faster:
- Did I use it in the last year? Seasonal items like a turkey roaster can stay, but they probably belong in a closet or garage, not prime kitchen real estate.
- Do I own a duplicate? Most kitchens hold three spatulas, two can openers and a drawer of mismatched lids. Keep the best one of each.
- Does another tool already do this job? A good chef’s knife replaces most single-purpose slicers and choppers.
- Is it expired? Check spices, sauces and pantry staples while you are at it.
Food storage containers deserve their own session. Match every container to a lid, recycle the orphans, and keep only as many as fit in one drawer or one bin.
Step 2: Set up work zones
Professional kitchens work because every station has its tools within reach. You can borrow that idea at home, even with a single run of cabinets. Think in terms of what you do, not what things are.
| Zone | Where it goes | What to store there |
|---|---|---|
| Prep | Your largest stretch of clear counter, ideally between the sink and the stove | Knives, cutting boards, mixing bowls, measuring cups |
| Cooking | Next to and below the range | Pots, pans, utensils, oils, salt, everyday spices |
| Cleaning | Around the sink and dishwasher | Dish soap, towels, trash and recycling, food wraps |
| Serving | Near the dishwasher or the table | Plates, glasses, flatware, so unloading takes one step |
| Storage | Upper shelves, pantry, corners | Backup supplies, bulk food, rarely used gear |
The goal is short trips. If you have to cross the room to grab a pot lid while something sizzles, that lid is in the wrong place. Walk through cooking a normal weeknight dinner and note every awkward reach. Each one is a small move to make.
Step 3: Give everyday items the best spots
The most valuable storage in any kitchen sits between your hips and your shoulders. That band is where daily items belong: the plates you use every night, the coffee mugs, the cooking utensils. Heavy items like a stand mixer or cast iron go low, at waist height or below, so you never lift them overhead. Things you use a few times a year go up high or out of the kitchen altogether.
Inside cabinets, a few simple inserts change how much you can fit:
- Shelf risers split a tall cabinet shelf into two levels, which doubles space for plates and bowls.
- Vertical dividers hold baking sheets, cutting boards and trays on their edges, so you can slide one out without lifting the stack.
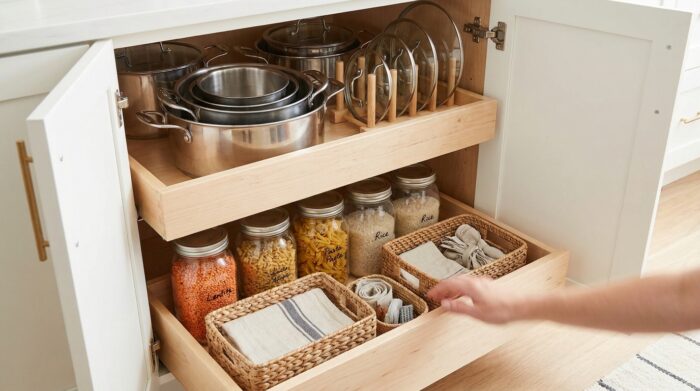
- Pull-out drawers or bins in base cabinets bring the back of the shelf to you.
- A turntable (a lazy Susan) makes a deep corner usable for oils, vinegars or cleaning supplies.
- Drawer dividers keep utensils from turning into a tangle.
Step 4: Go vertical on walls and doors
When cabinets are full, look up and look at the backs of things. Walls, the insides of cabinet doors and the space above the cabinets are all storage you are not using yet.
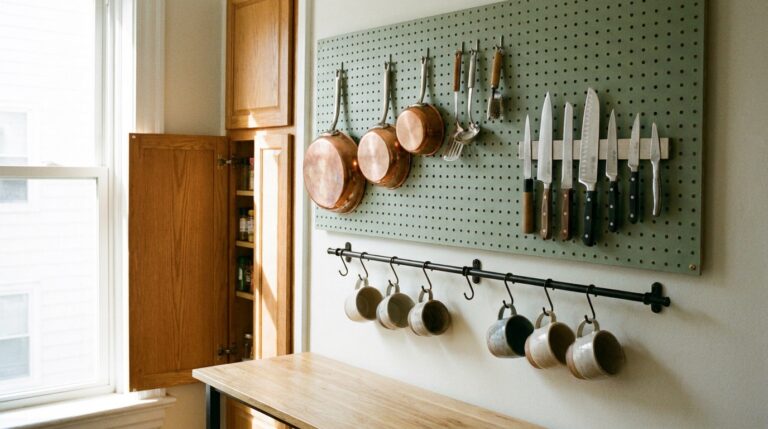
A magnetic knife strip frees a drawer or a block from the counter. A rail with S-hooks above the backsplash holds ladles, mugs or a small pan. One or two open shelves can carry everyday dishes, as long as you keep them to things you actually use and wash often. Over-the-door racks on a pantry or the inside of a cabinet door take spices, wraps or cleaning bottles. For a fuller list of fixtures and products for each of these spots, our guide to small kitchen storage covers them one by one.
The top of the refrigerator and the space above upper cabinets work for lightweight, rarely used items. Baskets or lidded boxes keep that zone from looking messy and catch the dust instead of your serving platters.
Step 5: Clear the counters
Counter space is the scarcest resource in a small kitchen, so treat it that way. A useful rule: only items you use every day earn a permanent spot. For many people that means the coffee maker, a knife strip or block, and a utensil crock by the stove. Everything else, including the toaster you use twice a week, can live in a cabinet or on a rolling cart.
Group what stays out on a tray. A tray turns a cluster of bottles into one object, makes wiping the counter faster, and gives you a clear boundary: if it does not fit on the tray, it goes away. For more ways to make a compact room feel bigger, from layout to color and lighting, browse our clever ideas for compact kitchens.
Step 6: Organize the pantry and the fridge
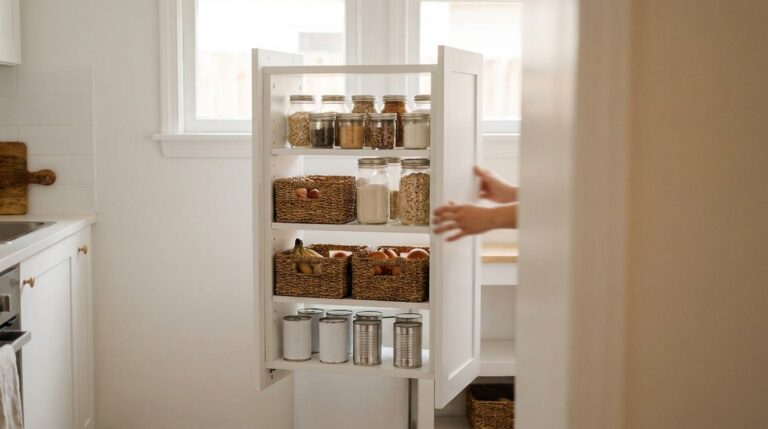
Food storage follows the same logic as the rest of the room. Group by category (baking, breakfast, snacks, canned goods), put the most used groups at eye level, and keep like with like so you can see when you are running low.
- Decant staples such as flour, rice and pasta into clear, square containers. Square shapes waste less shelf space than round ones, and you see the level at a glance.
- Label everything, including the date you opened it.
- Use bins as drawers on deep shelves, so you pull out the whole category instead of digging.
- In the fridge, keep leftovers and items to use first at the front, and give each shelf a job: drinks, dairy, prepared food.
Step 7: Build routines that keep it organized
An organized kitchen stays that way through small, boring habits rather than big weekend projects. These take a few minutes each:
- Reset every night. Run or unload the dishwasher, clear the counters, wipe them down. Starting the morning with an empty counter changes how the whole day feels in the room.
- Follow one in, one out. A new gadget comes in only if an old one leaves.
- Check the fridge before shopping. It cuts duplicate purchases and wasted food.
- Do a quick monthly sweep of one drawer or shelf. Small corrections stop clutter from creeping back.
- Put things back where they live. Labels on shelves help everyone in the household do this, not only the person who organized it.
Common mistakes when organizing a small kitchen
A few traps undo good work quickly:
- Buying containers first. Measure your shelves and count what you kept, then buy.
- Filling every inch. A cabinet packed to the edges is hard to use. Leave a little room so you can take one thing out without moving three.
- Storing by habit, not by use. Glasses do not have to live next to the sink just because they always have. Put them where you reach for them.
- Ignoring the hard-to-reach spots. A blind corner or a high shelf is fine for backups, but it needs a basket or a turntable to be usable at all.
Frequently asked questions
Where should I start organizing a small kitchen?
Start with the space that frustrates you most, often the utensil drawer or the cabinet under the sink. One quick win builds momentum for the rest of the room.
How do I organize a small kitchen with no pantry?
Turn one upper cabinet or a tall freestanding cabinet into a pantry zone, add door racks, and keep bulk buys to a minimum. A narrow rolling cart between the fridge and the wall can also hold cans and jars.
What should stay on the counter in a small kitchen?
Only what you use every day, ideally grouped on a tray. Appliances used weekly or less are better stored in a cabinet or on a cart.
How often should I declutter my kitchen?
A full declutter once a year is enough for most homes, with a quick check of one drawer or shelf each month and a look through the fridge before each grocery run.