Kitchen backsplash tile ideas often come down to two choices: the shape of the tile and the way it is laid. The same white ceramic can look like a 1920s apartment, a Parisian bistro or a minimalist loft depending on the pattern and the grout.
This guide covers the classic shapes, how grout changes the result and, for those who want to do it themselves, the steps for tiling a backsplash without surprises.
Subway tile: the classic, and how to update it
Subway tile takes its name from the glazed white tiles used in the first New York City subway stations, which opened in 1904. The classic size is 3 by 6 inches, laid in a running bond where each row is offset by half a tile. It is affordable, easy to cut and suits almost any kitchen.
To keep it from looking generic, change one variable:
- Size: longer formats such as 2 by 8 or 4 by 12 inches feel more contemporary.
- Layout: stacked horizontally, stacked vertically or in a third offset instead of a half offset.
- Finish: handmade-look glazes with slight variations add depth; a matte finish feels softer.
- Color: deep green, blue or black subway tile behind white cabinets makes the backsplash the feature.
- Edge: beveled subway tile catches the light and adds a vintage touch.
Herringbone and chevron
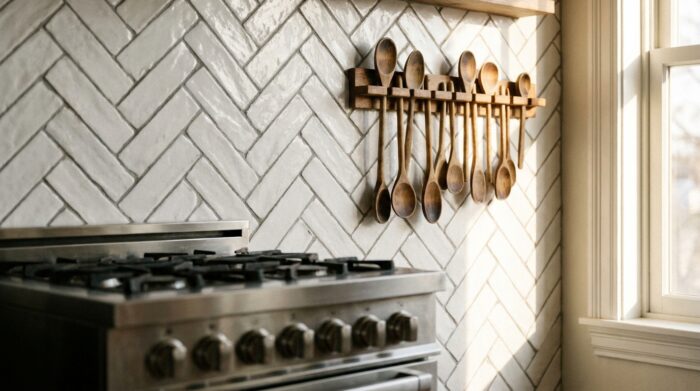
Herringbone lays rectangular tiles at right angles in a zigzag, each tile butting against the side of the next. Chevron looks similar but uses tiles cut at an angle so the ends meet in a clean point. Both add movement and work especially well behind a range or as a framed panel.
- Herringbone can use ordinary subway tile, which keeps the cost down.
- Laying the pattern vertically makes a low ceiling look taller.
- These patterns involve many cuts at the edges, so order more spare tile than for a straight layout.
- Start from a carefully drawn center line, because any drift becomes obvious as the zigzag climbs.
Hexagons, fish scales and other shapes
Shaped tiles soften a kitchen dominated by straight cabinet lines.
- Hexagon: small hexagons have a vintage feel, while larger ones read modern. Mixing two tones lets you create gradients or scattered accents.
- Fish scale (fan): rounded tiles that overlap visually, decorative and slightly retro. Best in a limited area.
- Penny round: tiny circles on a mesh sheet, with lots of grout; charming but more work to keep clean.
- Square and checkerboard: plain 4 by 4 squares in two colors give a graphic, retro look at low cost.
- Patterned cement-look tile: printed porcelain imitating encaustic tile works as a bold feature behind a range.
Shaped tiles usually come mounted on mesh sheets, which makes them faster to install than they look. Choose the shape that suits the size of the wall: very small mosaics on a large wall can look busy.
Grout: the detail that changes everything
Grout color can change a backsplash as much as the tile itself.
| Grout choice | Effect | Practical note |
|---|---|---|
| Matching (white on white) | Soft, seamless, the tile shape almost disappears | Light grout shows stains near the cooktop |
| Light contrast (pale gray) | Pattern visible but calm | A good compromise for most kitchens |
| Strong contrast (charcoal or black) | Graphic, highlights the pattern | Hides grime well; shows every installation error |
| Colored grout | Playful, adds an accent | Test on a spare board first |
Grout comes in sanded and unsanded versions: sanded grout is coarser and suits wider joints, while unsanded grout is finer and smoother for narrow ones. The bag specifies the joint widths each product is designed for, so pick the grout after you choose your spacers. Sealing cement grout, or choosing a stain-resistant grout, makes life easier behind the sink and stove.
Tiling a kitchen backsplash yourself
A backsplash is one of the most approachable tiling projects: the area is small, the tiles are light and mistakes are easy to redo. Plan a weekend, as the adhesive has to cure before grouting.
- Turn off the power to the outlets on the wall and remove the cover plates.
- Prepare the wall. It should be clean, dry, sound and flat. Degrease the area behind the cooktop and patch holes.
- Protect the countertop with cardboard or a drop cloth and painter’s tape.
- Plan the layout. Find the center of the main wall or the cooktop and dry-lay a row on the counter to avoid thin slivers at the ends.
- Start one spacer above the counter. This leaves an expansion joint you will fill with flexible caulk, not grout.
- Apply adhesive with the notched trowel size recommended by the tile and adhesive makers, working a small area at a time.
- Set the tiles with spacers and check level every few rows.
- Cut around outlets and at the ends with a tile cutter or wet saw. Outlet boxes may need extenders so the covers sit flush with the new surface.
- Let the adhesive cure for the time given on the product.
- Grout, clean and caulk. Press grout diagonally into the joints, wipe the haze with a damp sponge, then caulk the joint along the counter and inside corners.
Order roughly 10 percent extra tile for a simple layout, and more for herringbone or chevron. Keep a few spares after the job for future repairs.
If you are still weighing tile against glass, stone or paint, our overview of backsplash ideas for the kitchen compares every material. And for layout, storage and lighting tricks that pair with your new tile, explore our layout and storage ideas for small cooking spaces.
Kitchen backsplash tile ideas FAQ
What tile is best for a kitchen backsplash?
Glazed ceramic and porcelain are the most practical: durable, easy to clean and available in every shape. Natural stone is beautiful but needs sealing.
Can I tile over an existing backsplash?
Sometimes, if the old tile is firmly attached and flat. Clean and scuff it, use an adhesive suited to tile-on-tile, and check that outlets and trim still fit the added thickness.
Should backsplash grout be light or dark?
Light grout gives a soft, seamless look; dark grout highlights the pattern and hides stains. Behind a busy cooktop, a mid-gray is the easiest to keep looking clean.